I’ve been making videos for over a decade, and the single biggest change in the last two years isn’t a camera. It’s that I no longer need a production team to ship consistently.
Not because I’m a genius. Because the workflow is repeatable.
The workflow I’m about to describe is the one I actually run. It’s six stages. It routes shots to different models. It costs me between $40 and $80 a month in tools. And it runs whether I’m in the mood or not — because the structure makes the decisions for me.
That last part matters more than any model release. A repeatable workflow is a creative habit with a production line attached. Here’s the production line.
The Mental Shift: From Project to Pipeline
Most creators approach AI video project by project. A new idea arrives, they open a model, they generate, they assemble, they publish, and then they start over from scratch on the next one. That works for a while. Then it stops working, because every project is a new set of decisions.
The shift is to think in terms of a pipeline. A pipeline has stages. Each stage has an input, an output, and a decision. The decisions are the same every time. What changes is the content flowing through them.
A documented faceless video automation system runs a nine-stage daily pipeline: trend and idea research, script, AI voiceover, visuals and B-roll, word-by-word captions, 9:16 video assembly, thumbnail, SEO metadata, multi-platform publish, and an analytics feedback loop. That’s the level of structure I’m talking about. Not because you need nine stages, but because the stages are known.
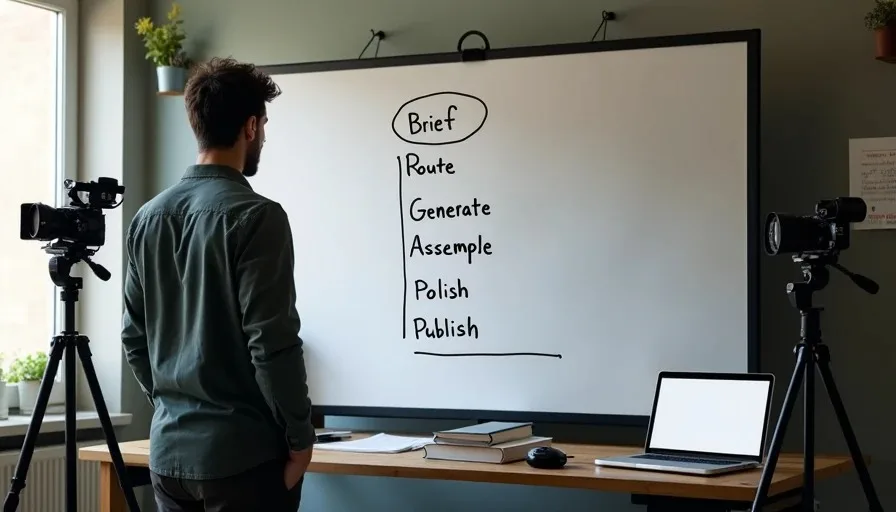
My workflow is six stages. Each one has a clear job.
Stage | Input | Output | Decision |
|---|---|---|---|
1. Brief | An idea | Shot list + style block | What is this video for? |
2. Route | Shot list | Model assignment per shot | Which tool for which shot? |
3. Generate | Assigned shots | Usable clips | Which generation is the shot? |
4. Assemble | Usable clips | Rough cut | Does the sequence work? |
5. Polish | Rough cut | Finished video | Does it hold attention? |
6. Publish | Finished video | Live post + metadata | Where does this go? |
Six stages. The work is the same whether I’m making a 60-second explainer or a 5-minute essay. The pipeline doesn’t care about the topic. It cares about the process.
Stage 1: The Brief (Ten Minutes, Saves Thirty Renders)
The thing AI didn’t replace is knowing what you want. A vague prompt gets you a vague clip, and you’ll waste renders chasing it.
The brief is not a script. It’s four decisions written down before you touch a model.
The job. What is this video for? A 6-second hook reads nothing like a 90-second explainer. The job determines the format, the pacing, and the length.
The shots. Rough-list the beats. Three beats is enough. “Hook shot. Example clip. Conclusion frame.” Even three beats beats a wall of prose.
The look. Cinematic and moody? Bright and flat? Handheld or locked-off? This decision drives model choice later.
The format. Landscape for YouTube, vertical for Shorts and Reels. Decide now — it changes framing for every shot.
The brief takes ten minutes. It saves thirty renders. In 2023 the brief fed a freelancer. In 2026 it feeds a model. Same discipline, faster payoff.
For a YouTube video, I add two more elements to the brief:
The thumbnail concept. What’s the one image that sells this video? I generate the thumbnail frame first, before any video. If the thumbnail doesn’t work, the video isn’t ready.
The hook shot. The first three seconds determine whether anyone watches the rest. I write the hook shot before I write the other shots. It gets the most generation attempts.
Stage 2: Route (The Biggest Shift From the Old Workflow)
Here’s the part that separates a 2026 workflow from a 2023 one: you no longer commit to one tool. You commit to one brief and then route each shot to whichever model nails it.
A single 60-second piece might use three different models: one for the cinematic establishing shot, one for fast iterative B-roll, one for the talking-avatar segment. Each model has a personality — physics, motion realism, prompt adherence, and how long it makes you wait.
Here’s my routing logic for YouTube production:
Cinematic hero shots and establishing footage → Runway Gen-4.5 or Veo 3.1. These cost more render time but carry the most important frames. Runway for camera control, Veo for native audio and realism.
Character-driven shots, handheld, and human performance → Kling 3.0. It’s the strongest model for human motion and facial expression, and its handheld camera work is unmatched.
B-roll, fast iteration, and cheap volume → Seedance 2.0 or Hailuo. The rate card is the lowest in the market, and for shots that just need to be “good enough,” the cheaper model is the right call.
Talking-head and explainer segments → AI avatars with a cloned voice. Not text-to-video. Far more reliable for lip-sync and message delivery.
Spatial reconstruction, crane moves, orbit shots → Luma Ray3. It’s the specialist tool for camera moves that change the viewer’s physical relationship to the subject.
The trade-off is almost always speed versus fidelity. A shot that needs to be precise goes to the precise tool. A shot that needs to be cheap goes to the cheap tool. The routing decision is editorial, not technical.
Stage 3: Generate (Overgeneration Is a Budget Line)
This is where the real cost lives. Across documented AI productions, the selection rate is roughly 25% — you generate four clips for every one that makes the final cut. A 3-minute episode generated 164 clips and used 41, with an average of 3 generations per usable shot.
That means overgeneration is not waste. It’s a budget line. Plan your generation budget at 3–4x what the finished runtime implies.
For a YouTube video, here’s how I structure generation:
Generate images before video. Image generation costs a fraction of video generation. I generate storyboard frames, iterate until they’re approved, then commit video credits only to approved frames. This alone prevents the most expensive failure mode.
Lock the character sheet before generating anything. Locking a character’s visual identity costs about $9.78 in generations — roughly five attempts. Skipping it costs 10–15 generations downstream when character drift forces whole-scene regeneration.
Generate in small batches at lower resolution first. Probe one shot before batching. Generate a single 720p version of a shot, evaluate the motion and composition, then re-render at full quality only if it works. This keeps clip-level rejection from blowing up the bill.
Route the cheapest shot to the cheapest model. Not every shot needs the flagship model. A static establishing shot that just needs subtle environmental life can go to Kling. A simple push-in can go to Runway. Save the expensive models for the shots that actually need them.
The documented cost per finished minute for AI production is $315–$750, with video generation credits making up 70–85% of the spend. For a YouTuber producing 20–30 short-form videos a month, the documented monthly range is $80–$120 for the tools alone.
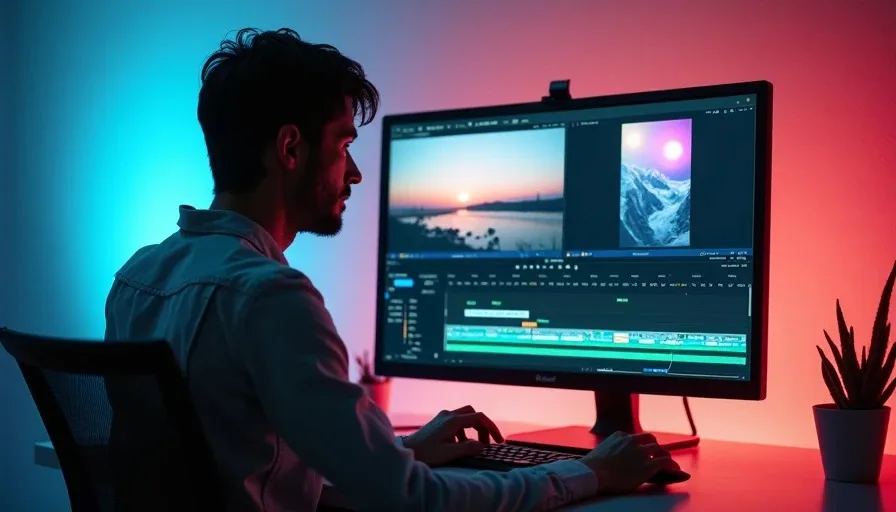
Stage 4: Assemble (The Edit Is Where the Film Is Found)

The usable clips go into an editor. DaVinci Resolve is free and handles everything a solo YouTuber needs: multi-track editing, color grading, Fairlight audio, and Fusion compositing. CapCut Pro ($19.99/month) is faster for social cuts and captions.
The assembly stage for a YouTube video is different from a narrative short. You’re not cutting a scene. You’re cutting a video — and the video has to hold attention from the first frame to the last.
Three things I do in every assembly:
Cut the head and tail of every clip. AI-generated footage often has motion drift after the first beat. I use 3–5 seconds of a 10-second generation. Cut on the character’s movement, not at the end of the clip.
Color match across models. Kling’s default grade is warmer than Runway’s. Luma’s shadows are cooler. Match all clips to a single reference frame from the hero shot.
Lay in the audio early. Not at the end. Ambient bed, music, and any voiceover go on the timeline before I start trimming. Audio determines pacing. Cutting without it is guessing.
A documented 70-second short was assembled in about 90 minutes in Resolve. A 5-minute YouTube video takes me about 3 hours across two sessions — one for assembly, one for polish.
Stage 5: Polish (The Difference Between Fine and Finished)
The rough cut is where the video exists. The polish is where it becomes watchable.
Pacing pass. Watch the rough cut without stopping. Where does your attention drift? Where does the video feel slow? Cut those frames. A YouTube video should never feel like it’s waiting for you.
Audio pass. Room tone under every cut. Music that rises and falls with the video’s energy. If there’s a voiceover, the audio needs to sit above the music, not in it.
Color pass. Match the generated clips to a consistent world. The goal isn’t perfect consistency — it’s a continuous visual experience.
Caption pass. Word-by-word captions for short-form. Accurate subtitles for long-form. Captions increase retention, and they’re the difference between a video that’s watchable in public and one that isn’t.
Thumbnail finalization. The thumbnail frame you generated in Stage 1 gets its final treatment. Text overlay, contrast adjustment, crop for platform.
The documented benchmark for AI production is 2–5 production days for a finished piece, with a 73% reduction in production time from traditional workflows (120 minutes down to 32 minutes per unit). For a solo YouTuber, a 5-minute video with 15–20 shots is a two-day project: one day for generation and assembly, one for polish and publish.
Stage 6: Publish (And Then Feed the Loop)
The video goes live. But the workflow doesn’t end there.
The pipeline includes an analytics feedback loop. What worked? Which video held retention? Which thumbnail got clicks? Which topic drove the most watch time?
That feedback goes into the next brief. The pipeline isn’t a line — it’s a loop. The output of one cycle becomes the input of the next.
For a YouTube channel, the feedback loop looks like this:
Retention data → tells you which shots or segments lost viewers. The next video’s shot list avoids those patterns.
Click-through rate → tells you which thumbnail concepts work. The next video’s thumbnail uses the winning pattern.
Topic performance → tells you which niches the audience responds to. The next brief starts in the winning territory.
The documented faceless video automation systems run this loop automatically. The analytics are pulled, the KPIs are fed back into the next idea generation cycle, and the pipeline runs again.
The Automation Layer: Turning a Workflow Into a Habit
A repeatable workflow can be run manually. But the real power comes from automating the parts that don’t require judgment.
The n8n and GitHub automation templates for AI video production handle the mechanical stages: idea generation, script writing, video rendering, polling for completion, and publishing to YouTube. One n8n workflow generates a title, description, and video prompt, sends the prompt to a video model, and automatically uploads the finished result to YouTube.
What the automation doesn’t handle is the judgment. The brief. The routing decision. The selection. The polish. Those are the stages where the pipeline stops and the creator steps in.
The right split is: automate the mechanical, keep the editorial manual. Let the pipeline handle the rendering, the publishing, and the analytics. You handle the decisions that make the video worth watching.
The Budget
Here’s what this workflow actually costs me per month:
Line Item | Cost |
|---|---|
Runway Gen-4.5 Standard | $15 |
Kling 3.0 Standard | $10 |
Seedance/Hailuo (API top-ups) | $10–$20 |
DaVinci Resolve | $0 |
CapCut Pro | $19.99 |
Music (Artlist, amortized) | ~$5 |
Total | $60–$70 |
The documented range for faceless video channels is $80–$120 per month for 20–30 videos. My stack sits at the lower end because I produce fewer, more deliberate videos. If you’re producing at high volume, the API top-ups will be the swing factor.
The real cost is overgeneration. A 5-minute video with 20 shots requires roughly 60 generations at 3 per usable shot. At an average of $0.10 per second across models, that’s $30–$50 in generation costs per video. On a $60 monthly budget, that’s one to two videos. Everything above that comes from API top-ups.
The Repeatability Test
A workflow is repeatable when you can run it on a bad day.
Can you open the brief template, fill in the four decisions, and route the shots without thinking? Can you generate, select, assemble, and publish without making a single novel decision? If the answer is yes, the workflow works. If the answer is “it depends on the project,” the workflow is still a set of habits, not a pipeline.
The test isn’t whether the workflow produces good videos. It’s whether the workflow produces any videos on the days when you don’t feel like making videos. That’s the difference between a creator who publishes consistently and one who burns out.
The pipeline is the discipline. The craft is the judgment inside it.
A good shot is not just generated. It is chosen. And a good workflow is not just a process. It’s a habit you can keep.
Frequently Asked Questions
What is the best AI video workflow for a solo YouTuber with no production team?
A six-stage repeatable pipeline: brief, route, generate, assemble, polish, publish. The key insight is that you don’t commit to one tool — you commit to one brief and route each shot to the model that handles it best. A documented faceless automation system runs a nine-stage daily pipeline covering trend research through analytics feedback. The stages matter more than the tools.
How much does a solo YouTuber spend on AI video tools?
A solo YouTuber typically spends $60–$120 per month on AI video tools. Documented faceless video channels run $80–$120 per month for 20–30 videos. The subscription is the floor, not the total. Overgeneration adds $30–$50 per finished video in API top-ups, and the documented cost per finished minute for AI production is $315–$750.
Which AI video tools should a YouTuber use?
Route by shot type. Runway Gen-4.5 ($15/month) for camera-driven and cinematic shots. Kling 3.0 ($10/month) for character-driven shots, handheld, and human performance. Seedance or Hailuo for cheap B-roll and volume. DaVinci Resolve (free) for editing. CapCut Pro ($19.99/month) for social cuts and captions. Total: $60–$70 per month.
How many AI video generations does it take to make a YouTube video?
Expect 3–4 generations per usable shot, and a 25% selection rate overall. A 5-minute video with 20 shots requires roughly 60 generations. Documented productions generated 164 clips for a 3-minute episode and used 41 — a 25% selection rate with an average of 3 generations per usable shot. Overgeneration is a budget line, not waste.
Can I automate my AI video workflow?
Yes, for the mechanical stages. Automation templates for n8n and GitHub handle idea generation, script writing, video rendering, polling for completion, and publishing to YouTube. The judgment stages — brief, routing, selection, polish — remain manual. The right split is: automate the mechanical, keep the editorial human.
What’s the biggest mistake solo YouTubers make with AI video?
Generating before planning. A vague prompt gets a vague clip, and you waste renders chasing it. The brief — four decisions written down before touching a model — takes ten minutes and saves thirty renders. The second biggest mistake is committing to one tool. Route each shot to the model that handles it best.
How long does it take to make an AI video as a solo creator?
A 5-minute video with 15–20 shots is a two-day project: one day for generation and assembly, one for polish and publish. Documented AI productions run 2–5 production days for finished pieces, with a 73% reduction in production time from traditional workflows (120 minutes down to 32 minutes per unit). The variable is iteration discipline, not runtime.